Switching to Neovim
Intro
Neovim 0.5 has been released! To celebrate, here’s a post about my experience switching from Vim 8 to it.
I’ve been a semi-serious Vim user for almost five years now. I regularly use it for editing text files and working on small-to-medium size software projects. When things get a little bigger I usually reach for IntelliJ (even though I never use it for Java) or CLion. I use the Vim plugin with these IDEs and am pretty happy with the experience and productivity I get with them.
However, I do find some things lacking. Or, rather, I think things could be better.
In this post I’ll break down what I’m trying to achieve by switching to Neovim 0.5 and walk through a basic configuration for things such as
native LSP,tree-sitter,nvim-compe, andtelescopewith a focus on getting set up for Rust development.
My full Neovim configuration can be found in my dotfiles repo
IDEs
To start, I’ll explain some pros and cons of my IDE workflow.
Pros
Debugging. This depends on the language, but basically everything besides Rust (which is still very good), is a breeze to debug and provides really detailed information.
Refactoring. Specifically,
movingfunctions to different files and having imports automatically configured, andrenamingvariables/functions/ect. and having the changes propagate through all affected files.Zen Mode. I don’t always use this, but when I do, it’s a really nice way to focus on code, and code only.
Cons
Terminal. The built in terminal is pretty meh. It does the job for simple things, but I spend a lot of time using
tmuxoutside of IDEs, so that’s a high bar to reach.File navigation. I’ve just never learned how to navigate and open files quickly without using the mouse.
Tabs. Like my browser, I always end up with too many tabs open.
My goal is that everything besides debugging should be at least equal to, but hopefully better, with Neovim. (One day I’ll get good at GDB and ditch IDEs for good.)
The plan is:
- native LSP can handle refactoring
- Vim is already way more zen like and plugins can get the rest of the way
- terminal is native and I can run Vim in tmux
- file navigation and tabs (buffers in Vim) are handled by telescope
Why Neovim 0.5
At this point, you may be wondering: “Well, why not just use regular Vim?”
Neovim 0.5 comes with some major changes from 0.4 that, for the first time, appear to make the switch worth it. I was first tipped off to this by this blog post. Most notably is the native language server protocol (LSP), which has traditionally needed a plugin such as CoC or YouCompleteMe for similar functionality.
Further, the tree-sitter integration, improved Lua support, thriving
community, and (let’s be honest here) hype make Vim feel exciting. Which is
weird, but also awesome.
If you’re interested, I recommend the Neovim news post explaining the release in some detail. Christmas can come in July!
Ok, enough of this. Let’s get into it.
LSP
To explain, I will just quote directly from the above Neovim news post.
The Language Server Protocol (LSP) is an open, JSON-RPC-based protocol for communication between code editors and language servers, which provide programming language-specific features such as
- completion,
- hover/tooltips,
- go to definition,
- show/go to references,
- show method signatures,
- rename,
- code actions (automatic formatting, organize imports, …),
and more.
…
Neovim 0.5 provides an LSP client written (mostly) in Lua that provides a highly configurable and extensible way of accessing these features. It does not aim at competing with more feature-rich and “out-of-the-box” plugins like CoC.nvim but is meant to be tailored to your preferences (while still being useable with reasonable defaults).
Got it? Good. To start, the nvim-lspconfig plugin is needed, which can be installed by:
Note: I use vim-plug but any plugin manager should work.
This handles launching and initializing language servers, but those servers
still need to be installed manually. See the
CONFIG.md
file for all the available options. I’ll be focusing on
rust-analyzer, but I’m also
assuming the rust-analyzer binary has been installed using one of the methods
described here.
Once installed, add the following to your init.vim.
Restart Neovim and load a Rust file. To ensure a connection to rust-analyzer
run :LspInfo and you should see something similar to
Configured servers: rust_analyzer
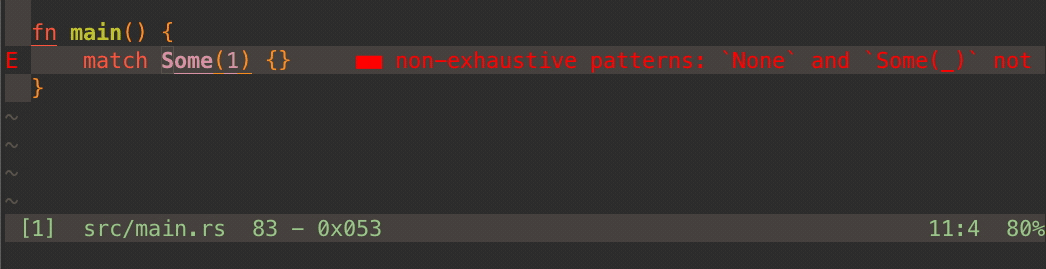
Great! But now what? All that’s configured so far is just Neovim connecting to and getting information back from the LSP. In order to use this information we need to call the correct functions, and for that, we need keybinds:
Run :h vim.lsp.buf for an explanation of what each does. My three most
commonly used are likely rename, definition, and code_action (which does
many things, but I find the most useful are filling all arms of a match and
adding import statements).
Remember one of my pros of an IDE is its renaming functionality; which is now handled by LSP. Check ✓.
nvim-compe
There are a few different completion plugins out there. After trying one and it not working very well, I tried nvim-compe and it seems to do the job just great.
Add the following to your init.vim.
And add the configuration. Note that I set preselect to always, which will
make the first completion suggestion always highlighted. This lets you just
press enter to select it, instead of pressing tab to highlight it first
(which is what enable does).
telescope
Telescope is probably my
favorite plugin. It is similar to fzf
(which is also an awesome plugin) but is much more extensible. Essentially, it
allows for using fzf over different sources, e.g. git, files, LSP, ect.
It’s so extensible that it will be hard to convey it’s power succinctly, so I’ll just explain a couple of my use cases. But first, some keybinds:
The first two are sourcing a custom .lua file (found below), in which I have
defined my own pickers. A picker is essentially a list to fzf over, and by
creating custom ones, I can tune them to my specific use case.
If I hit ,vrc I will get a searchable list of all my dotfiles. I can now pull
up my dotfiles from anywhere while I’m using Neovim and make a quick edit.
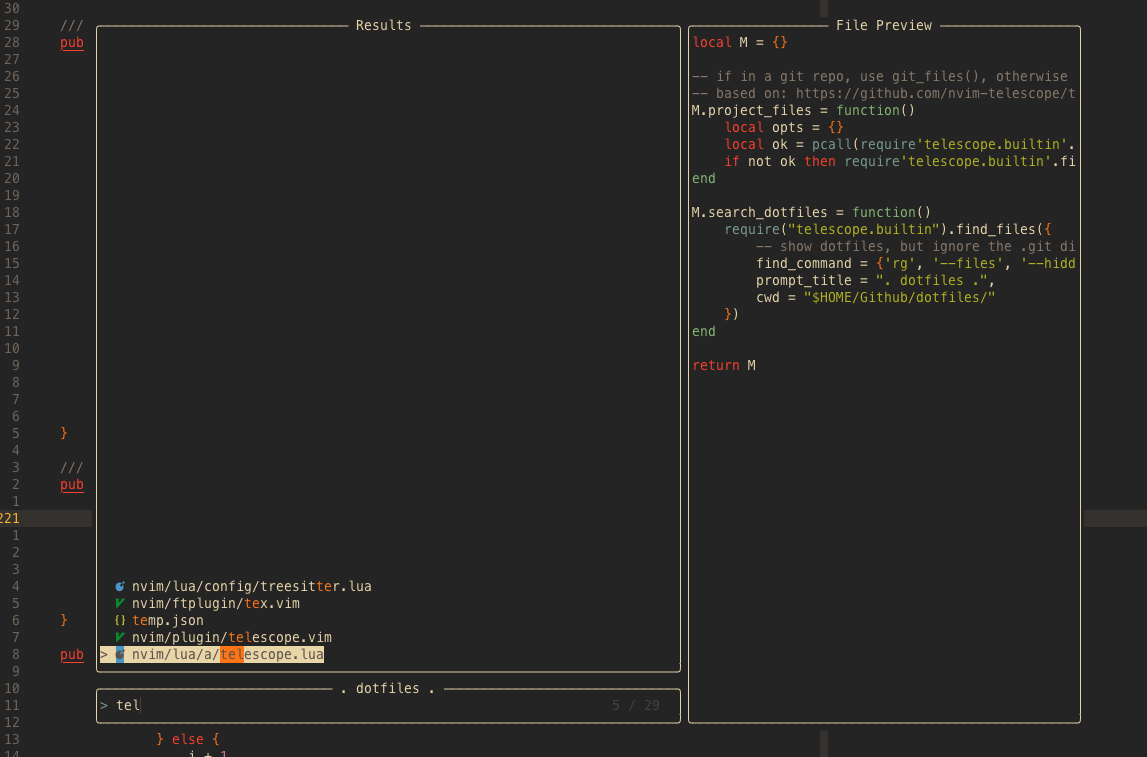
Using telescope to open my dotfiles.
If I hit ctrl-p I get a searchable list of all files in my current directory,
respecting the .gitignore file if I’m in a repo. Pressing enter opens the
file, ctrl-v will open it in a split. Using one of the built-in pickers,
buffers, allows me to press ctrl-b to open a list of all my open buffers.
In combination, these two pickers solve my IDE cons about too many tabs and slow file opening. After a couple weeks, it has felt like a massive productivity boost while navigating large projects (and small/medium too).
I recommend reading through the telescope README, there’s a lot of cool things you can do with it!
tree-sitter
tree-sitter is a parser generator tool and an incremental parsing library. It can build a concrete syntax tree for a source file and efficiently update the syntax tree as the source file is edited.
Basically, it enables smarter and more efficient syntax highlighting. For more info, check out this section in the Neovim news post and this reddit post.
To use it, the nvim-treesitter plugin is needed. First verify its
requirements.
Then, install the plugin:
Next, install any desired available languages. For example, for Rust:
And now enable it in your init.vim:
Other goodies
rust tools
rust-tools adds some nice
functionality on top of rust-analyzer. Notably, inlay hints.
Add the configuration to your init.vim:
I’ve omitted the default configuration parameters, see the README for more options.
highlighted yank
Built in highlighted yank! Which I previously used this plugin for.
Simply add the following to your init.vim:
TrueZen
TrueZen is a plugin that creates
different “modes” for editing. It’s similar to another plugin, GoYo, but has
three modes instead of just one.
My primary use case is the Focus mode, which maximizes the current buffer.
This is useful when I’m working on my laptop and having two buffers
side-by-side starts cutting off the one I’m editing.
Additionally, the Ataraxis mode is nice when I want to focus on only code,
just like one of my pros of IDEs. Check ✓.
There’s quite a lot of configuration options available. I found that this plugin
was a bit more finicky than others, and depending on other plugins you have
installed, you will need to change it to suit your needs. To start, add the
configuration to your init.vim:
I’ve omitted most of the default configuration as it seems to be changing often, so make sure to check the README to get the most up to date one.
Add finally some keybinds:
Outro
To review my pros/cons of IDEs, I’ve covered everything except debugging. After a couple weeks using this setup I think I’ve accomplished my goal of meeting or exceeding my IDE experience. Most notably, the cons seem to have simply dissolved; in their place, a happy and productive Andrew.
And while this may seem like a lot of work for getting an editor similar to VSCode or CLion/IntelliJ, I believe it’s worth it. If you’ve made it this far, you probably agree with that. The best part is, there is much more to explore and further improvements to be made. Such is life using Vim, a never ending mini-game of tweaks and efficiency gains.
Next steps
My next plugins to get working. Stay tuned.
trouble
A pretty list for showing diagnostics, references, telescope results, quickfix and location lists to help you solve all the trouble your code is causing.
ultisnips
UltiSnips is the ultimate solution for snippets in Vim. It has many features, speed being one of them.